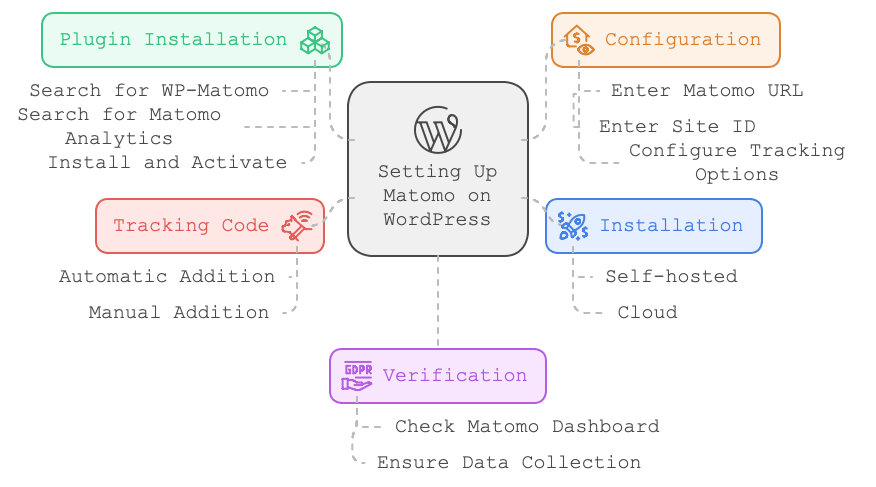
To use Matomo (formerly known as Piwik) on WordPress, you can follow these steps:
1. Install Matomo:
– Self -hosted: Install Matomo on your own server
– Cloud: Use Matomo Cloud hosting service
2. Install a Matomo WordPress plugin:
– Search for “WP -Matomo” or “Matomo Analytics” in the WordPress plugin directory
– Install and activate the plugin
3. Configure the plugin:
– Enter your Matomo URL and site ID
– Configure tracking options as desired
4. Add tracking code:
– The plugin usually adds the tracking code automatically
– If not, you can manually add it to your theme’s header.php file
5. Verify tracking:
– Check your Matomo dashboard to ensure data is being collected
Yes, aYes, a Matomo URL is still needed even for self -hosted installations. Here’s why:
1. URL structure: The Matomo URL is the web address where your Matomo installation is accessible. For a self-hosted setup, this would typically be a subdomain or subdirectory of your website.
2. Connection point: The WordPress plugin needs to know where to send data and retrieve reports from. This URL acts as the connection point between your WordPress site and your Matomo installation.
3. Example format: For a self-hosted installation, your Matomo URL might look something like:
– https://matomo.yourdomain.com (if using a subdomain)
– https://yourdomain.com/matomo (if using a subdirectory)
4. Configuration: When setting up the Matomo plugin in WordPress, you’ll need to provide this URL so the plugin knows where to communicate with your Matomo installation.
5. Security: Ensure you use HTTPS for your Matomo URL to encrypt data transmission between WordPress and Matomo.
Even though you’re hosting Matomo yourself, it still needs to be accessible via a web URL for the WordPress plugin to interact with it properly. URL for the WordPress plugin to interact with it properly.
Why URL is needed
The Matomo URL is needed for several important reasons:
1. Data transmission:
– The URL provides the endpoint where your WordPress site sends tracking data.
– It tells WordPress where to send information about page views, user interactions, and other tracked events.
2. API communication:
– The Matomo plugin in WordPress uses the URL to communicate with Matomo’s API.
– This allows the plugin to fetch reports, update settings, and perform other actions directly from your WordPress dashboard.
3. Authentication:
– The URL is part of the authentication process, ensuring that data is sent to and retrieved from the correct Matomo instance.
4. Report generation:
– When you view Matomo reports within WordPress, the plugin uses this URL to request and display the data.
5. Multi-site setups:
– In cases where you’re tracking multiple websites with one Matomo installation, the URL helps differentiate between different sites’ data.
6. Configuration and setup:
– The URL is crucial for initial setup and ongoing configuration of the Matomo-WordPress integration.
7. Security:
– Using the correct URL ensures that your data is sent to your own Matomo installation, not a third-party or incorrect location.
In essence, the Matomo URL serves as the bridge between your WordPress site and your Matomo analytics installation, facilitating all necessary communication and data exchange between the two systems.
Leave a Reply
You must be logged in to post a comment.